Browse »
Home » Archives for December 2013
Best Boot Animations Available For Samsung Galaxy Y GT-S5360
Have you ever been tired of seeing the old boot animation of your galaxy y. If you are rooted, then you can enjoy a variety of cool boot animations. Here i have provided a list of Boot animation that you can try with your Gt-S5360. I didn't include any animations that need to be flashed in order to work. So it will be easy to try out.
Warning:
- Rooting Voids warranty. Do this at your own risk.
- Back up all your data before proceeding with any of the methods listed here.
Requirements:
- Root your Galaxy Y -- Link
- Download Android File manager with Root access -- Try Root Browser
Steps to Add Your Boot Animation:
- Download the required boot animation. I have provided a list below the instructions.
- Make sure that the file is named as bootanimation.zip . if it is any other name , please rename it as given.
- Now you have to open Root Browser and navigate to /system/media . Now locate your original boot animation file which will be named as "bootanimation.zip".
- Long press the file ,choose Rename ,then rename it to "bootanimation1.zip".
- Now copy the custom "bootanimation.zip" to /system/media and paste it. Long press the file and choose "permissions". Choose rw-r-r--
- There you go, you have successfully changed your boot animation. To revert back to stock animation, just delete current zip and rename "bootanimation1.zip" to "bootanimation.zip"
for any help, feel free to comment...
Read full post »
How To Root Gionee Elife E3 & Install CWM Recovery
Gionee E3 is a feature packed android device with a friendly pricing. It has a 4.7 retina display with 1920x1080 resolution and 320ppi. This rooting method is tested on Gionee E3 with Android 4.2.1.
Warning:
- Rooting voids warranty. Do this at your own risk.
- Back up all necessary data before undergoing these steps.
- Make sure your device have at least 65% battery charge left.
Downloads:
E3 MTK USB Drivers---Link
Rooting:
- Download and install USB drivers for E3 on your PC
- Download Motochopper zip file and extract it on PC.
- Enable USB Debugging on your E3: Settings-->Developer Options-->USB Debugging
- Connect device to PC via USB cable.
- From the Motochopper extract folder, execute "run.bat". If you are using Linux or OS X, navigate to the extracted directory in a terminal and execute "./run.sh".
- Approve ADB connection from your PC to Device.
You have rooted your Gionee E3 successfully!
Recovery:
- Download and install Mobileuncle MTK tool from playstore.
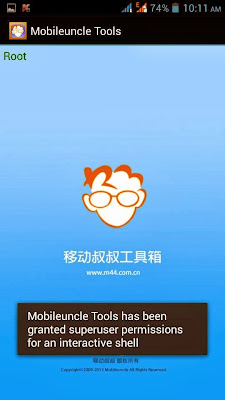
- Start Mobileuncle Tools and grant SU rights.
- Download the required CWM recovery zip and extract it to get the recovery.img file. Copy the recovery file to root of your SD card.
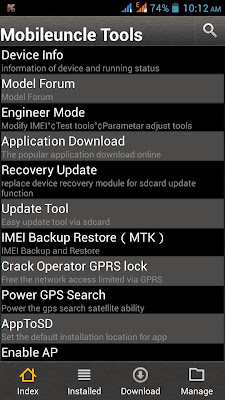
- Open Mobileuncle tool and choose "Recovery Update" option.
- You will see the copied "recovery.img" file . Select it at confirm that you want to flash it.
- You have succesfully flashed CWM recovery. In order to get into CWM you can either use Mobileuncle or Press Vol+Power buttons.
That's it, you have roooted and installed recovery on your Gionee Elife E3.
Read full post »
How To Root & Unroot Xolo Q800 And Flash Recovery
Xolo q800 is a powerful android device which comes with a handy price. It comes with 4 GB internal memory and 1 GB RAM.Primary Camera is 8MP and secondary is 1MP. Powered by Mediatek MT6589M Quad core 1.2 GHz CPU and a capable PowerVR SGX544 GPU for quality gaming.
Warning:
- Rooting voids all kinds of warranty. Do this at your own risk
- Make sure your data are all backed up
- Have at least 60 % battery charge left on your device
Downloads:
Part 1---Rooting:
- Download and install Framaroot apk on your device.
- Open Framaroot and choose "Install SuperSU" from drop down menu.
- Now select the required exploit -"Boromir" from newly appeared box. Then Reboot. You have successfully rooted your
Part 2--Recovery:
- Copy the downloaded TWRP rar file to your SD card and extract it. Now copy the "recovery.img" file to root of your SD card.
- Download the MobileUncle MTK tool from playstore. Link is given above. After installing open it and select "Recovery Update".


- Now a new screen will pop up showing the recovery.img found in the root of your SD card, that we copied earlier. Then reboot into recovery and you have
flashed twrp recovery.
Part 3---Unroot
- Download Stock Recovery from link given in downloads section. Copy the stock recovery.img file downloaded and place it in root of your SD card. Remove any previous recovery files present in SD card.
- Open Mobileuncle MTK tools and select "recovery update". Then reboot into recovery
- Open framaroot and select "Unroot" option from drop down box. Then select "Boromir" from newly appeared box. After completion you have successfully unrooted your Q800.
Read full post »
How to Unbrick Your LG Optimus L3 E400 -Stock Firmware
You might have bricked your LG L3 during Cyanogen or other ROM installations or during Rooting process . Here is the method to Unbrick your precious LG L3 and bring it to stock.
Note: This method can also be used by non-bricked people who wishes to to return to stock firmware. For them, just enable USB debugging on your device, Turn it off afterwards and continue with the steps as mentioned.
Requirements:
- Download and install LG PC Suite & USB Driver--Link
- Download Stock Firmware according to your country --Link ( if you didnt get the file, please refresh again and again. I had to do it for about 7 or 8 times )
- Download KDZ updater--Link
- Install msxml file found in the KDZ updater folder. The Restart Your PC. ( This will solve the wparam 100 and lparam 6 issue)
Let's Begin:
- Get your device into emergency mode --->remove the battery and put is back again and then press vol UP +
vol DOWN + power button at once.Then wait for a vibration. Now you
will see a emergency mode written on yellow background.
- Connect your LG L3 to your PC using USB cable.
- Next open KDZ updater (Run as Administrator only) and select >> Type: 3GQCT -- PhoneMode:DIAG
- Select the .kdz firmware file that you have downloaded in the KDZ file section.
- We are ready to start the process. Click on the "Launch software update" , it will take some time to finish. If everything goes okay, then you will see a "Finished" message in log. Now your phone has been switched off from Emergency mode.
- Next ,turn it on. This will also take some time. Don't worry, its normal the first time.
You have successfully completed unbricking process.!
feel free to comment.
Read full post »
How To Install Hyperion 8 GM Final Build ROM On Samsung Galaxy Y GT-S5630
Hyperion 8 is the fastest ROM out there for Samsung Galaxy Y GT-s5360.It has some exceptional features which makes it stand out. This theme is based on Gingerbread. Here are the features of the ROM.
- Full Root Support-updated to latest SuperSU binary + SuperSU v1.65
- BusyBox is pre-installed
- Deodexed system apps for themeing
- Apps are made to use optimum RAM thereby increasing speed drastically
- supports init.d
Warning:
- Rooting Voids warranty. Do this at your own risk
- Make sure to backup all data as flashing a custom rom will erase them.
- have at least 70% charge remaining on your device before starting.
- Do not try this for any device other than GT-s5360.
I have already written a post on installing JellyBlast. I have written instructions for Newbies to flashing a custom ROM and those who flashed Jellyblast.
Downloads:
- Download this Temporary CWM--Link
- Download Hyperion ROM package --Link1---Link2
- Download RIL Fix--Link
Download these files and copy them to your SD card root.
|
Let's Begin:
For New Users:
- Boot into Recovery-Press Vol up+ Home+ Power buttons simultaneously
- In recovery navigate to "Install zip from SD card" option using volume keys. Select using Home button.
- After that select the Temp-CWM.zip file you have already downloaded.
- You will then see ClockWorkMod Recovery with texts in yellow color. In ClockWorkMod recovery choose "Mounts and Storage".
- Mount /system, /data, cache
- Return using Power Button or back key
- Now select "advanced and debugging".
- Select "wipe dalvik cache" and "wipe batterystats.bin"
- Go back and then select "wipe data/factory reset"
- Now select " install zip from SD card"
- Select "choose zip from SD card"
- Select HYPERION-08.GM-FINAL.zip already downloaded.
- After that go to "mounts and storage" . Mount /system, /data, cache.
- Select "install zip from sd card"
- Select "choose zip from sd card"
- Select RIL Fix package (HYPERION-08.GM-RIL.FIX.zip)
- Go back by pressing the power button or the back key.
- After that, reboot your phone.
You have successfully Installed Hyperion 8 GM Final Build on Your Galaxy Y.
For Jellyblast Users:
Those who have already flashed some other ROMS like jellyblast , should Wipe everything before flashing Hyperion 8.
Use the RIL Fix if you have IMEI issues. (IMEI Missing or no network reception issues)
But any way, its safer if you flashed stock ROM , then flash Hyperion.
There you go. You have installed a smooth and incredibly Fast Hyperion ROM for your Galaxy Y.
Read full post »
How To Root Sony Xperia U st25i Firmware 6.1.1.B.1.10
Son Xperia U is one of the cutest Android devices out on the market. It comes with Gingerbread but can be updated to ICS. This method is for the firmware 6.1.1.B.1.10. running on ICS.
Courtesy to Bin4ry.
Warning:
- Rooting Voids Warranty. Do this at your Own Risk.We aren't responsible for any damages occurred to your device
- Make Sure you have at least 65% charge left
- Backup all necessary information, as the process might erase precious data.
Let's Begin:
- Enable USB-Debugging from Developer Options. Settings--> Developer Options-->USB Debugging
- Now Use this link to Download Sony Xperia Flashtool--Link
- Next you have to install drivers for the flashtool as it doesn't come preloaded. Form the setup, choose required files. --Link
- Now connect your device to PC
- Start the Xperia Flashtool installed. If you have a 64bit OS run only the 64bit application.
- If device is detected you could see that all the options are available for selection.
- Next Click on "Root" button, then select "Superuser" and press "OK". Rooting procedure will initiate.
- When prompted click the restore button on your phone, Make sure that you have chosen "RootME" recovery before restoring.
- You device will now reboot. It will do that three times. Please wait.
After rebooting go to app drawer and check whether Superuser app is present. If it is then you have successfully rooted Xperia U.
Read full post »
How To Upload Personal E-books And Other Documents To Play Book
There are lots of E-Book readers out on the store for android. Today i will show you how to upload your personal ebooks , pdfs ,documents etc to Google Play Books. Take your PDF's anywhere.
Make sure you have the latest versions of Play books in your device.
Procedure:
- Use your PC, to visit-Google Books. Now from the books tab, choose "Uploads".
- Select the files you want to add and press Open.
( You can upload a total of 1000 files with each capped at 50MB )
- After uploading you can access these files from any computer or Android device. keep your Application up to date .
There you go! Enjoy reading PDF's on your Play Book with those page animations.
Read full post »
How To Root Nexus 7 [wifi] 2012 Using Wug's Toolkit
[ Applicable To All Android Versions Up To- 4.4.2]
[ This Tutorial Is Based On Android 4.4.2 Kit Kat an Wug Toolkit v1.7.9 ]
Nexus 7 is one of the most reputed tablets available in the android market. Equipped with amazing features and unbelievably low price. This extremely rare combination, made the Nexus 7 the best selling Android tablet.
All that power and you feel like chained. Unable to explore the world of rooting which lies beyond.?
Well you just can't use the Nexus 7 Without rooting.
Warning:
- Rooting voids all kinds of warranty. Do this at your own risk.
- Make sure your device is charged at least 60%
- Back Up all your Personal Data-It will get wiped out during the process.
Let's Begin:
Part 1: Setup
- Download Wug's Nexus Root Toolkit- Link
- Install Root kit on your PC
- It will automatically start Toolkit after installation, if it doesn't start manually.
- Now it will ask to specify your Nexus device and android version. I have selected My Nexus 7 2012 Wifi model and , Android 4.4.2 Kit Kat (KOT49H). You could choose your version as such.
- Now It display a window regarding USB connection methods. You have to enable USB Debugging.
- By default, the developer options are unavailable in setting menu. For getting it, go to "About tablet" in settings-->tap on Build number for 7 times, it will display a message that " you are now a developer".
- Now go to settings-->Developer Option-->Enable USB Debugging
- You also need to uncheck "MTP" option in "USB connection" (from Storage option
- Now it will download the boot images and recovery images. Make sure you have internet connection available at the time.
- After downloading is complete your Toolkit is up to date and ready to roll.
Part 2 - Unlocking

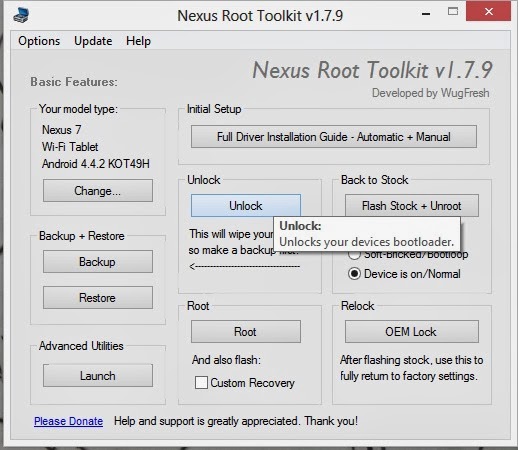
- Now click on "Unlock" option. Now you will get a message about unlocking. It warns us that all of the data stored in the device will be wiped out. So it is of utmost importance that you back up all your apps and data. Also the tool kit has a backup feature which can backup all your data+app and media files.
- Press OK to continue. Now it will ask you whether to auto reboot into boot loader mode first. If you have connected the device while its on via usb debugging then, the toolkit can automatically send the device to bootloader mode.
- Press Yes, if your device is powered on. Otherwise read the instructions it has provided.
- After pressing OK, it will start the process, messages will be displayed on screen like "Checking ADB status"..., " Device Connected"... "Rebooting your device into Bootloader"..." Fastboot Status"...
- If a message is displayed saying that the device isn't connected, just redo the steps and try again.
- Now on your device you will see a new window showing " Unlock Bootloader". Navigate using Volume keys and select "Yes "using Power key. the unlocking process will initiate.
- After the process is finished, the device will reboot. While on the computer screen, you will see a new message box, containing a list of instructions. These are important. So go through it.
- once the rebooting is complete, you will have to go through the initial setup or you can skip it.
- Enable USB debugging on your device.
- You are ready to root. Finish this by clicking " OK"
You have Successfully Unlocked Your Bootloader. Next Up is Rooting Your Nexus 7.
Part 3- Rooting Nexus 7
- After successfully unlocked , we can safely continue to rooting.
- Next on the tool kit press Root. Below root button,you can choose whether to install Custom recovery or not. Its best to tick that option or it wont do any harm even if you dont tick it. If you want a custom recovery like CWM touch/ TWRP then tick it and start.
Also In order to choose which recovery you need. Go to Option-->Options-->Custom recovery Tab and select anyone you like ( CWM/TWRP)
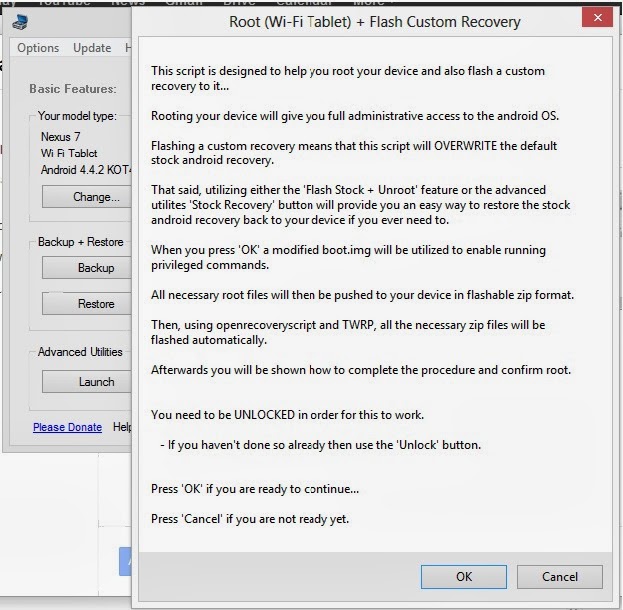
- Now Click on the Root Button and you will receive a message showing some info on rooting and few instructions.

- Press OK and it will continue with the rooting process.
- After some time the process will be completed, the toolkit will push SuperSU and other apps into device. When the process is complete , you will receive a message with instructions to update binaries of SuperSu.
- open app drawer , tap on SuperSU. It will ask you to update binaries. Press continue, make sure you have internet connection. after complettion, press OK. Now go to BusyBox installer and then Grant Super user permissions.
There you go you have successfully rooted your Nexus 7. Enjoy!
Feel free to comment...
Read full post »


.jpg)


